The Honeywell T6 Pro Smart Thermostat is a cutting-edge, energy-efficient device designed for seamless home comfort control. It offers advanced features like remote access via the Honeywell Home app, geofencing, and smart scheduling to optimize heating and cooling. With compatibility across various HVAC systems, it provides a flexible solution for diverse home setups, ensuring optimal performance and energy savings.
1.1 Overview of the T6 Pro Smart Thermostat
The Honeywell T6 Pro Smart Thermostat is a modern, user-friendly device designed to enhance home comfort and energy efficiency. It features a sleek design, intuitive interface, and compatibility with smart home systems. With advanced temperature control, geofencing, and energy-saving modes, it ensures optimal heating and cooling while reducing energy consumption, making it a versatile solution for smart home enthusiasts.
1.2 Key Features and Benefits
The T6 Pro Smart Thermostat offers smart scheduling, geofencing, and energy-saving modes for enhanced efficiency. Its compatibility with various HVAC systems ensures wide applicability. The thermostat integrates seamlessly with smart home systems, allowing remote control via the Honeywell Home app. Enhanced security features include a lock screen with a 4-digit PIN, preventing unauthorized changes. These features make it a versatile and secure solution for modern homes.

System Requirements and Compatibility
The T6 Pro Smart Thermostat is compatible with most standard 24V HVAC systems, including gas, oil, electric, and dual-fuel configurations. It requires a stable Wi-Fi connection for full smart functionality.
2.1 Compatibility with HVAC Systems
The T6 Pro Smart Thermostat is designed to work with a wide range of HVAC systems, including gas, oil, electric, and dual-fuel setups. It is also compatible with heat pumps and can support single-stage or multi-stage systems, ensuring versatility for various home configurations. This broad compatibility makes it suitable for most residential heating and cooling needs.
2.2 Wi-Fi and Smart Home Integration
The T6 Pro Smart Thermostat seamlessly integrates with home Wi-Fi networks, enabling remote control and scheduling through the Honeywell Home app. It is compatible with popular smart home systems like Amazon Alexa and Google Assistant, allowing voice commands and enhanced automation. This integration ensures a connected and efficient home environment, optimizing comfort and energy usage effortlessly.
Pre-Installation Preparation
Before installing the T6 Pro, ensure compatibility with your HVAC system and gather necessary tools. Understand your current thermostat setup to avoid installation issues.
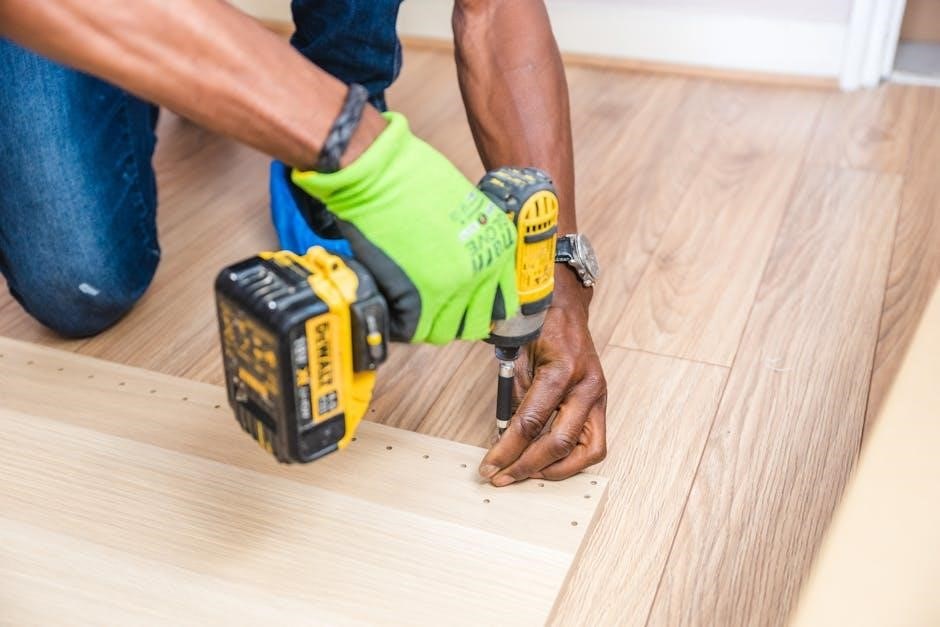
3.1 Tools and Materials Needed
To install the T6 Pro, gather essential tools: a screwdriver, wire strippers, and a voltage tester. Materials include wall anchors, screws, and the Universal Wall Plate (UWP). Ensure all items are ready for a smooth installation process.
3.2 Understanding Your Existing Thermostat Setup
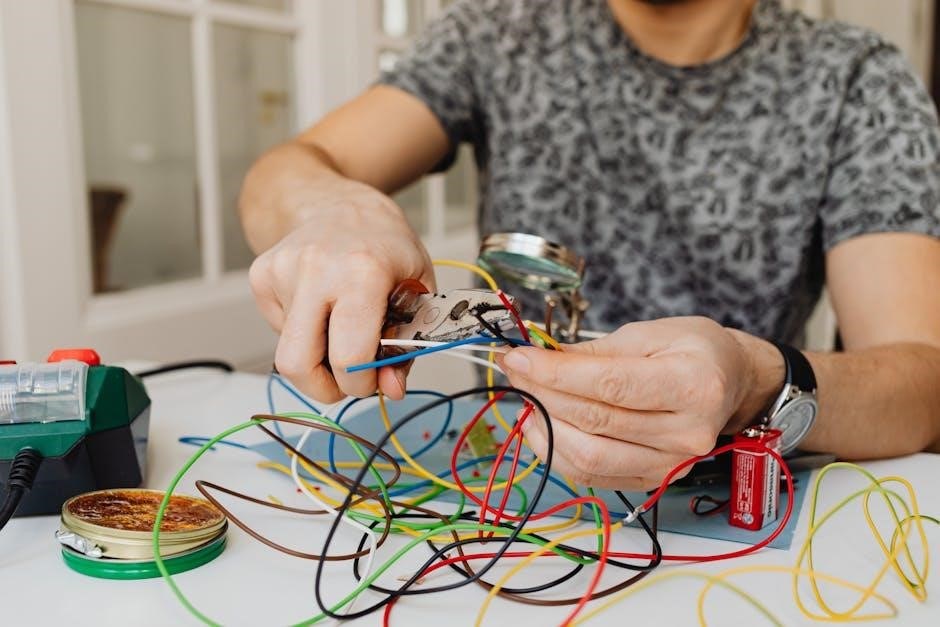
Before installing the T6 Pro, inspect your current thermostat setup. Identify the wires, their labels, and any existing jumper configurations, such as Y2 and W2. Understanding your system’s wiring and configuration ensures compatibility and a smooth transition. Label wires if necessary, and verify the type of HVAC system you have to avoid installation errors.
Installation Guide for T6 Pro Smart Thermostat
Mount the Universal Wall Plate, connect wires according to the setup, and perform final checks to ensure proper installation and safe operation of the thermostat.
4.1 Mounting the Universal Wall Plate (UWP)
Begin by removing the door from the UWP to access the wiring hole. Insert the wires through the hole, then align the UWP with the wall anchors. Secure the plate tightly to ensure stability. For uneven walls or specific installations, use the optional cover plate to conceal gaps or adapt to junction boxes. Ensure all screws are tightened firmly for a flush mount.
4.2 Connecting Wires to the Thermostat
Match each wire from your existing system to the corresponding terminal on the T6 Pro thermostat. Gently insert wires into their respective slots, ensuring secure connections. If your system has a jumper between Y2 and W2, transfer it to the new thermostat. Tighten terminal screws firmly and organize wires neatly. Double-check all connections before proceeding to ensure proper functionality.
4.3 Final Installation Checks
Ensure the T6 Pro thermostat is level and securely mounted. Verify all wires are tightly connected and properly routed. Check for any visible damage or loose connections. Power on your HVAC system and test heating and cooling modes to confirm functionality. Ensure the thermostat display is clear and responsive. Review the Honeywell Home app for successful pairing and system recognition; Consult the manual if issues arise during these checks.
Wiring Considerations
Ensure proper handling of jumper wires (Y2 and W2) and verify all connections match your HVAC system. Correct wiring is crucial for optimal thermostat performance and safety.
5.1 Handling Jumper Wires (Y2 and W2)
Identify if your system requires a jumper between Y2 and W2. If present, ensure it remains intact unless specified otherwise. Disconnecting or misconnecting these wires can disrupt heating and cooling functions.
5.2 Common Wiring Mistakes to Avoid
Ensure correct wire connections to avoid system malfunctions. Never connect Y2 to W2 without verifying compatibility. Mislabeling wires or skipping steps can lead to improper thermostat operation. Always refer to the manual for specific wiring configurations and double-check connections before powering up the system to ensure smooth operation.
Configuring the Thermostat
Start by setting up the Honeywell Home app for thermostat configuration. Connect the device to Wi-Fi and pair it with your smartphone for remote access and control.
6.1 Setting Up the Honeywell Home App
Download the Honeywell Home app from the App Store or Google Play. Create an account, then log in to begin pairing your T6 Pro thermostat. Ensure your device is connected to Wi-Fi. Follow in-app instructions to register your thermostat and complete the setup process for remote control and smart home integration.
6.2 Wi-Fi Connectivity and Pairing
Ensure your T6 Pro thermostat is in Wi-Fi setup mode. Open the Honeywell Home app, select your thermostat model, and choose your home Wi-Fi network. Enter your Wi-Fi password and follow the app’s prompts to complete pairing. Once connected, the thermostat will be remotely accessible, allowing you to control settings and receive updates through the app.

Advanced Features and Customization
The T6 Pro offers advanced features such as voice control and smart home integration, allowing for customized scheduling and energy-saving modes that enhance comfort and efficiency seamlessly.
7.1 Geofencing and Smart Scheduling
The T6 Pro Smart Thermostat utilizes geofencing technology to detect your location and automatically adjust temperatures, optimizing comfort and energy savings. Smart scheduling allows you to create custom temperature plans through the Honeywell Home app, ensuring your home is always at the perfect temperature when you arrive or leave, while minimizing energy waste when no one is home.
7.2 Energy-Saving Modes and Settings
The T6 Pro Smart Thermostat offers multiple energy-saving modes, including Eco and Smart modes, which optimize heating and cooling based on your schedule and preferences. These settings can be customized through the Honeywell Home app to reduce energy consumption when you’re away or sleeping, ensuring maximum efficiency and cost savings.

Troubleshooting Common Issues
Common issues include Wi-Fi disconnections, thermostat lockouts, and display malfunctions. Restarting the device or checking wire connections often resolves these problems efficiently.
8.1 Resolving Wi-Fi Connection Problems
To resolve Wi-Fi issues, restart the thermostat and router. Ensure the network name and password are correct. Check signal strength; move closer to the router if necessary. If issues persist, reset the thermostat to factory settings via the app, but note this will erase custom configurations. Consult the Honeywell Home app for additional troubleshooting guidance.
8.2 Addressing Thermostat Lock and Unlock Issues
If the thermostat is locked, enter the 4-digit pin to unlock it. The default pin is often “1234,” but verify via the Honeywell Home app or manual. If unknown, check the thermostat’s date code and add “1234” to it. Resetting the thermostat may also resolve lock issues. For persistent problems, refer to the user manual or contact Honeywell support.
Maintenance and Updates
Regularly clean the thermostat’s screen and sensors for optimal performance. Check for firmware updates via the Honeywell Home app to ensure the latest features and bug fixes.
9.1 Regular Maintenance Tips
Regular maintenance ensures optimal performance and energy efficiency. Clean the thermostat’s display and sensors with a soft cloth to prevent dust buildup. Check for firmware updates via the Honeywell Home app to access new features and improvements. Inspect wiring connections to ensure they are secure and undamaged. Replace batteries (if applicable) as indicated by low-battery alerts.
9.2 Updating Firmware and Software
Keep your T6 Pro Smart Thermostat up to date by regularly checking for firmware and software updates. Use the Honeywell Home app to download and install the latest versions. Ensure your thermostat is connected to Wi-Fi during updates. Updates enhance performance, security, and compatibility, and may add new features. Always follow on-screen instructions carefully to avoid installation issues.
Congratulations! You’ve successfully installed your T6 Pro Smart Thermostat. For additional support, visit the official Honeywell website or contact their customer support center.
10.1 Summary of Key Installation Steps
- Mount the Universal Wall Plate (UWP) using wall anchors and screws.
- Connect the thermostat wires to the appropriate terminals on the UWP.
- Attach the T6 Pro thermostat to the UWP and secure it firmly.
- Download and configure the Honeywell Home app for Wi-Fi setup and smart features.
- Perform final checks to ensure proper system operation and connectivity.
10.2 Where to Find Additional Support and Manuals
For additional support and manuals, visit the Honeywell Home website or download the Honeywell Home app. The app provides installation guides, troubleshooting tips, and access to customer support. You can also find detailed manuals and videos through the Honeywell support portal. Contact customer service directly for personalized assistance with your T6 Pro Smart Thermostat installation and configuration.