Understanding Motor City Pizza
Motor City Pizza, inspired by Detroit-style deep dish, offers a unique culinary experience․ Frozen options, like Costco’s, present a convenient way to enjoy this flavorful pizza at home․
Cooking methods vary, with oven, air fryer, and microwave options available, each impacting the crust’s crispiness and overall texture․ Experimentation with toppings is encouraged!
What is Motor City Pizza?
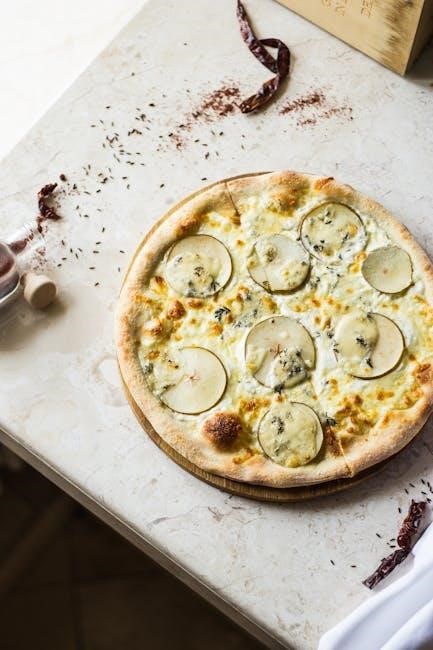
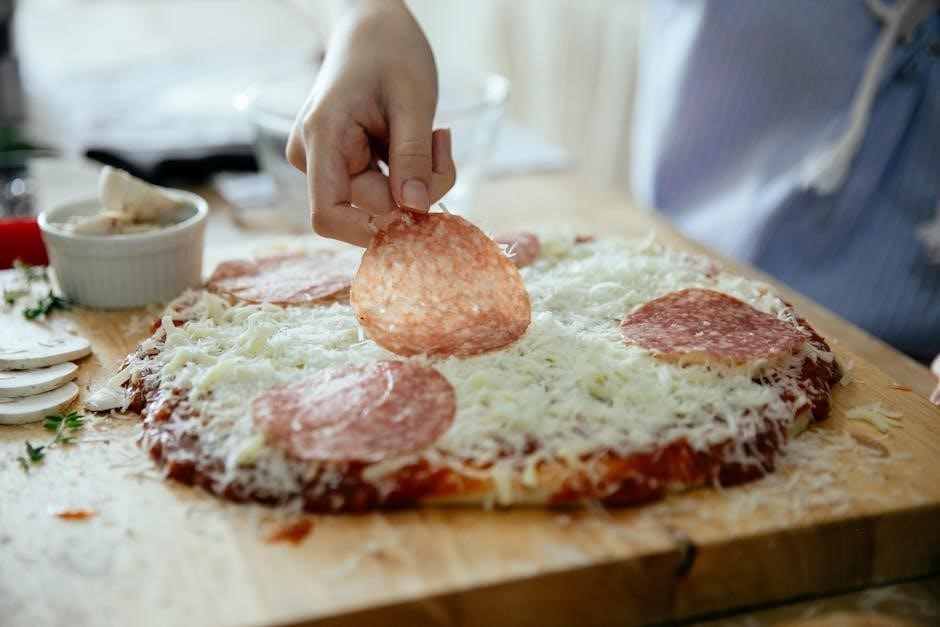
Motor City Pizza, a delightful homage to Detroit’s rich culinary heritage, is essentially a square or rectangular deep-dish pizza celebrated for its thick, airy crust and generous toppings․ It’s a style born from the automotive industry’s blue-collar roots, utilizing readily available steel trays – repurposed auto parts – as baking pans․
This unique baking method creates a characteristically crispy, caramelized crust edge, a hallmark of authentic Detroit-style pizza․ Typically, the cheese is layered directly onto the dough, followed by the sauce dolloped on top, though variations exist․ Costco’s version aims to capture this essence, offering a convenient frozen option for pizza enthusiasts to experience a taste of “Motor City” in their own kitchens․ It’s a frozen roulette, but potentially a very good one!
The Detroit-Style Influence
Motor City Pizza owes its distinct character to the pioneering work of Buddy’s Rendezvous in Detroit, Michigan․ In 1946, Buddy’s began serving pizza in square, steel-pan trays borrowed from the local auto industry – a clever repurposing that defined the style․
This method yields a remarkably thick, focaccia-like crust with incredibly crispy, cheesy edges, achieved through the direct contact with the hot metal․ The sauce, traditionally applied in “racing stripes” on top of the cheese, adds a vibrant finish․ Costco’s pizza attempts to replicate this iconic style, focusing on the crusty edges, open crumb, and the option of sauce placement․ It’s a tribute to a Detroit institution, bringing a slice of history to your table․
Costco’s Motor City Pizza: An Overview
Costco’s Motor City Pizza, often referred to as their deep-dish offering, is a frozen convenience that aims to capture the essence of Detroit-style pizza․ It’s a substantial pizza, designed to feed a crowd, and typically comes with a generous layer of cheese and a robust tomato sauce․
While a “roulette” in terms of frozen pizza quality, Costco’s version generally receives positive reviews for its flavor and potential for a crispy crust when cooked correctly․ The key to success lies in understanding the optimal cooking method – oven, air fryer, or microwave – and adjusting accordingly․ Many enthusiasts recommend enhancements like adding pesto or jalapeños before baking to elevate the flavor profile․

Cooking Methods
Motor City Pizza can be prepared using three primary methods: oven baking, air frying, and microwaving․ Each technique yields different results regarding texture and speed․
Oven Instructions
Oven baking is a reliable method for cooking Motor City Pizza, though it typically requires the longest cooking time․ Begin by preheating the oven to the recommended temperature, generally around 400°F (204°C), to ensure even heat distribution․
Baking time and temperature will vary slightly depending on your oven, but a good starting point is 20-25 minutes․ For a truly crispy crust, consider placing the pizza directly on the oven rack, or using a pizza stone․
Achieving a crispy crust in the oven can be enhanced by briefly broiling the pizza during the last few minutes of cooking, but watch carefully to prevent burning․ Thawing the pizza slightly before baking can also improve results․
Preheating the Oven
Preheating the oven is a crucial first step for successfully baking Motor City Pizza․ A properly heated oven ensures the pizza cooks evenly and develops a delightfully crispy crust․ Aim for a consistent temperature of 400°F (204°C)․
Allow sufficient time for the oven to reach the desired temperature – typically 15-20 minutes․ Using an oven thermometer can verify accuracy, as oven dials aren’t always precise․
A fully preheated oven helps to create that signature Detroit-style crust, characterized by its airy interior and caramelized, crispy edges․ Don’t rush this step; patience yields a superior pizza!
Baking Time and Temperature
For optimal results with Motor City Pizza in the oven, a baking temperature of 400°F (204°C) is recommended․ The baking time typically ranges from 20 to 25 minutes, but this can vary depending on your oven․
Begin checking for doneness around the 20-minute mark․ The pizza is ready when the cheese is melted and bubbly, and the crust is golden brown and crispy․ Rotating the pizza halfway through baking promotes even cooking․
Keep a close watch to prevent burning, especially around the edges․ Adjust baking time slightly based on your oven’s performance and desired level of crispness․
Achieving a Crispy Crust in the Oven
To maximize crust crispiness when baking Motor City Pizza, several techniques are beneficial․ Preheating the oven thoroughly is crucial, ensuring even heat distribution․ Placing the pizza directly on the oven rack, rather than a baking sheet, allows for better air circulation underneath․
Consider briefly broiling the pizza during the last few minutes of baking, closely monitoring to prevent burning․ Thawing the pizza slightly before baking can also contribute to a crispier base․
Adding a sprinkle of cornmeal under the pizza before baking can enhance texture․ Remember, oven temperatures and baking times may need slight adjustments based on your specific oven․
Air Fryer Instructions
Utilizing an air fryer is often considered the optimal method for cooking Costco’s Motor City Pizza, delivering a superior crust compared to oven or microwave methods․ The rapid air circulation creates a remarkably crispy exterior․
Before starting, ensure your air fryer is large enough to accommodate the pizza; some models may require cutting it in half․ The air fryer significantly reduces cooking time, making it a convenient option for a quick and satisfying meal․
Experimentation with settings may be needed, but generally, a slightly lower temperature than oven baking yields excellent results․ This method is favored for its ability to replicate the texture of a traditionally baked Detroit-style pizza․
Air Fryer Advantages
The primary advantage of using an air fryer for Costco’s Motor City Pizza lies in its ability to achieve a remarkably crispy crust․ Unlike ovens, air fryers circulate hot air rapidly, ensuring even cooking and a delightful texture․ This mimics the traditional brick-oven style often associated with Detroit-style pizza․
Furthermore, air frying significantly reduces cooking time compared to conventional oven methods, making it ideal for a quick weeknight meal․ It also requires less preheating, saving energy and further streamlining the cooking process․
The concentrated heat helps to melt the cheese beautifully and create those signature crispy, caramelized edges that define a great Motor City Pizza experience․ It’s a convenient and effective way to elevate your frozen pizza game!
Optimal Air Fryer Settings
For achieving the best results with your Costco Motor City Pizza in the air fryer, a temperature of 350°F (175°C) is generally recommended․ This provides sufficient heat for thorough cooking without burning the crust prematurely․
Avoid overcrowding the air fryer basket; cooking the pizza in a single layer ensures even heat distribution and optimal crisping․ If necessary, cook in batches․ Many users suggest utilizing the air fryer’s pre-set pizza function, if available, for simplified operation․
Experimentation may be needed based on your specific air fryer model․ Start with the recommended settings and adjust slightly if needed to achieve your desired level of crust crispness and cheese melt․ Consistent monitoring is key!
Air Fryer Cooking Time
Typically, cooking a Costco Motor City Pizza in the air fryer requires approximately 12-15 minutes․ However, this timeframe can fluctuate based on your air fryer’s wattage and the pizza’s initial frozen temperature․
Begin checking for doneness around the 12-minute mark․ The pizza is ready when the cheese is fully melted and bubbly, and the crust is golden brown and crispy․ Rotating the pizza halfway through the cooking process promotes even heating and prevents hot spots․
Remember, air fryers cook faster than conventional ovens․ Careful monitoring is crucial to avoid burning․ A slightly longer cooking time may be necessary if the pizza was deeply frozen․
Microwave Instructions
While not ideal for achieving a crispy crust, the microwave offers a quick option for cooking Costco Motor City Pizza․ It’s best suited when time is limited, acknowledging the textural compromises․
Place the frozen pizza on a microwave-safe plate․ Cover loosely with microwave-safe plastic wrap, venting one corner to allow steam to escape․ This helps prevent a soggy pizza․ Microwave on high for approximately 6-8 minutes, but cooking times vary significantly based on microwave wattage․
Check for doneness and adjust cooking time accordingly․ Be aware that the crust will likely be soft, and the cheese may not brown․ The microwave prioritizes speed over optimal texture․
Microwave as a Quick Option
When time is of the essence, the microwave presents the fastest route to enjoying Costco Motor City Pizza․ It’s a pragmatic choice for a speedy meal, though it’s important to understand the trade-offs in texture compared to oven or air fryer methods․
This method is particularly useful for a quick lunch or snack when a fully-crisped pizza isn’t a necessity․ While the crust won’t achieve the desired crunch, the pizza will become heated through and the cheese melted․
Consider the microwave a convenient solution when prioritizing speed over achieving the authentic Detroit-style crispy crust experience․ It’s a viable option, especially for individual servings․
Microwave Cooking Time
For a quick and easy preparation using the microwave, begin by placing a single slice of Costco Motor City Pizza onto a microwave-safe plate․ A typical cooking time ranges from 2 to 3 minutes on high power․ However, this can vary depending on your microwave’s wattage․
It’s recommended to start with 2 minutes, then check for doneness․ If the cheese isn’t fully melted or the pizza isn’t heated through, continue microwaving in 30-second intervals until it reaches your desired temperature․
Remember that microwaving can sometimes create soft spots․ For a slightly improved texture, place a paper towel underneath the slice to absorb excess moisture during cooking․
Limitations of Microwave Cooking
While the microwave offers speed and convenience, it’s crucial to acknowledge its limitations when preparing Motor City Pizza․ The primary drawback is the inability to achieve a truly crispy crust; microwaves primarily heat from within, leading to a softer texture․
Compared to oven or air fryer methods, the microwave often results in uneven heating, with some areas becoming overly soft while others remain cool․ This can compromise the overall enjoyment of the pizza’s texture and flavor․
Furthermore, the microwave doesn’t replicate the browned, slightly charred edges characteristic of Detroit-style pizza․ It’s best considered a last resort when time is extremely limited, prioritizing speed over optimal quality․
Enhancements & Customization
Motor City Pizza lends itself beautifully to personalization! Adding toppings before cooking, experimenting with sauce variations, and crust improvements elevate the experience․
Adding Toppings Before Cooking
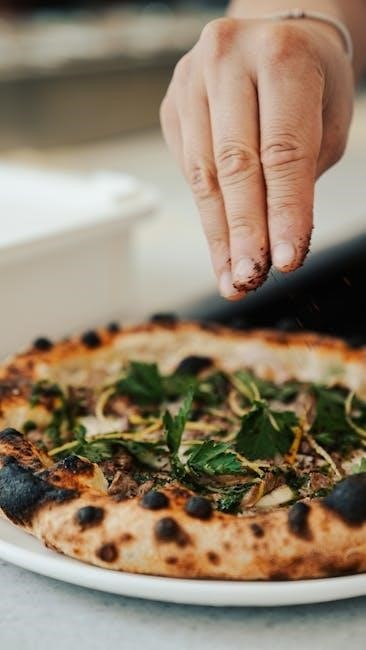
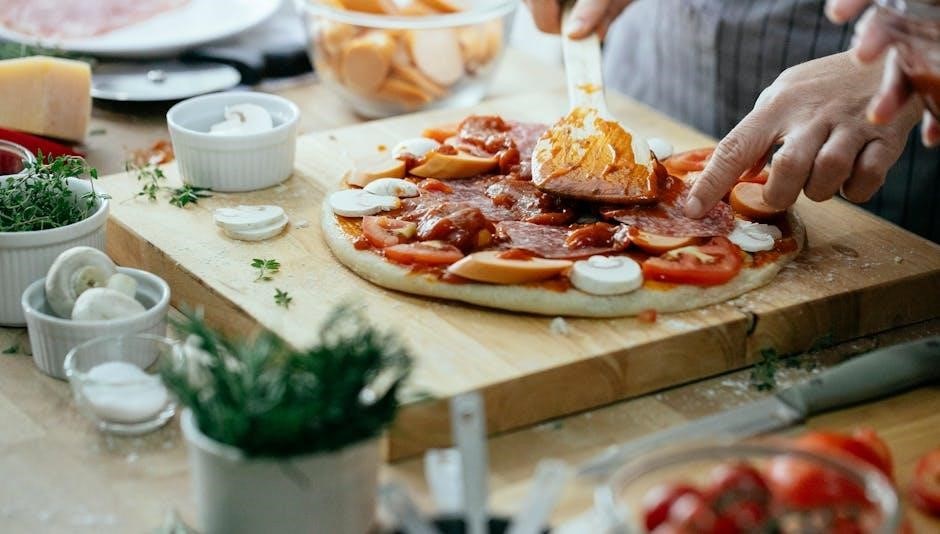
Motor City Pizza truly shines with customized toppings! Before baking, consider popular choices like black olives, vibrant yellow or orange peppers, and generous amounts of shredded mozzarella cheese․ A sprinkle of oregano adds a classic Italian touch․
Don’t be afraid to experiment with flavors! Some enthusiasts suggest adding a layer of Kirkland pesto under the cheese for a unique, herbaceous base․ Jalapeños provide a delightful kick for those who enjoy a bit of spice․
Remember, the possibilities are endless․ Feel free to explore your favorite pizza combinations and create a truly personalized Motor City Pizza experience․ The key is to add toppings generously before the baking process begins, ensuring they meld beautifully with the cheese and sauce․
Popular Topping Choices
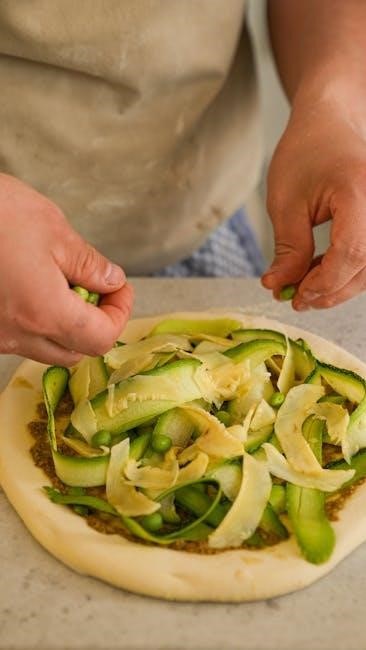
When enhancing your Motor City Pizza, several toppings consistently rise to the top in popularity․ Classic choices include savory black olives, offering a briny counterpoint to the rich cheese and sauce․ Colorful bell peppers, particularly yellow and orange varieties, add a touch of sweetness and visual appeal․
Of course, extra shredded mozzarella is always a welcome addition, creating an even more decadent and cheesy experience․ For a burst of aromatic flavor, a sprinkle of dried oregano is a timeless favorite․ Many pizza lovers also enjoy incorporating pepperoni or Italian sausage for a meaty kick․
Ultimately, the best toppings are those you enjoy most! Don’t hesitate to mix and match to create your perfect Motor City Pizza masterpiece․
Experimenting with Flavors
Beyond the traditional toppings, Motor City Pizza lends itself beautifully to flavor experimentation․ Consider adding a vibrant kick with sliced jalapeños, offering a delightful heat that complements the cheesy base․ A smear of Kirkland pesto before cooking introduces a fresh, herbaceous note, elevating the overall taste profile․
Don’t be afraid to explore different cheese blends – a combination of mozzarella and provolone can add complexity․ For a unique twist, try incorporating crumbled Italian sausage with a touch of fennel․ A sprinkle of red pepper flakes can also provide a subtle warmth․
Remember, pizza is a canvas for creativity! Feel free to venture beyond the expected and discover your own signature Motor City Pizza flavor combinations․
Sauce Variations
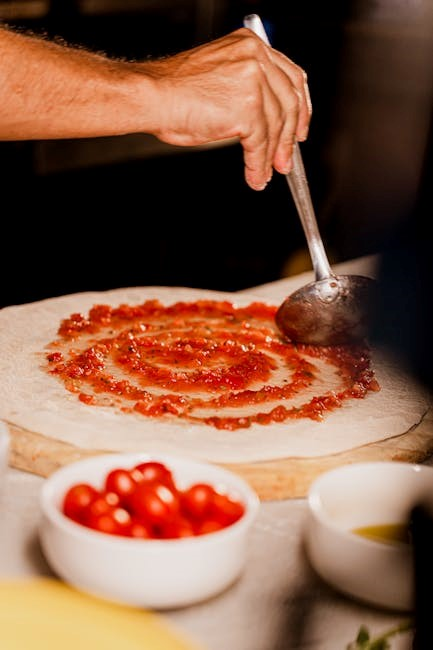
Motor City Pizza traditionally features the sauce ladled on top of the cheese, a hallmark of Detroit-style pizza, though variations exist․ Experimenting with sauce types can dramatically alter the flavor profile․ While the Costco version comes with a specific sauce, consider crafting your own for a personalized touch․
A simple homemade sauce using crushed tomatoes, garlic, oregano, and a pinch of sugar offers a fresh alternative․ For a spicier kick, incorporate red pepper flakes or a dash of cayenne pepper․ Some enthusiasts prefer a sweeter sauce with a touch of brown sugar․
The debate continues: sauce first or last? While unconventional, placing sauce under the cheese can create a different textural experience․ Ultimately, the best approach depends on your personal preference!
Cheese Placement: Sauce First or Last?
The traditional Motor City Pizza method dictates placing the sauce over the cheese, creating a unique caramelized effect as the cheese melts and slightly browns under the heat․ However, deviating from this norm can yield interesting results, sparking debate among pizza aficionados․
Some prefer layering the sauce beneath the cheese, believing it prevents the crust from becoming soggy and provides a more integrated flavor experience․ This method can also result in a cheesier bite, as the sauce doesn’t dilute the cheese’s intensity․
Ultimately, the “correct” placement is subjective․ Experimenting with both approaches allows you to discover which method best suits your taste preferences and desired texture․ Don’t be afraid to break tradition!
Homemade Sauce Options
While Costco’s Motor City Pizza comes with its own sauce, crafting a homemade version elevates the experience․ A simple tomato sauce, simmered with garlic, oregano, and a touch of sugar, provides a classic base․ For a bolder flavor, incorporate roasted red peppers or a pinch of red pepper flakes․
Consider a sauce inspired by Detroit-style pizza traditions – a sweet and slightly tangy sauce is key․ Some recipes call for adding a small amount of brown sugar or maple syrup to achieve this balance; Don’t underestimate the power of quality canned tomatoes!
Experiment with different herbs and spices to personalize your sauce․ A splash of balsamic vinegar can add depth, while fresh basil brightens the overall flavor profile․
Crust Improvement Tips
Achieving that signature crispy, chewy crust is crucial for a satisfying Motor City Pizza experience․ Thawing the pizza for a short period – around 30-60 minutes – before baking can significantly improve the crust’s texture, allowing for more even cooking․ Don’t fully thaw, though, as it can become soggy․
A unique trick is using pesto! Spreading a thin layer of Kirkland Signature pesto directly onto the crust before adding toppings introduces a delightful herbaceous flavor and promotes extra crispiness․ It creates a flavorful barrier that prevents sauce from making the crust soggy․
Ensure the pizza is placed directly on the oven rack or air fryer basket for maximum airflow and crisping․
Thawing for Better Results
While convenient, cooking a frozen Motor City Pizza directly can sometimes result in an unevenly cooked center and a less-than-ideal crust․ Thawing the pizza beforehand, even partially, is a simple step that yields noticeable improvements․ Aim for a thawing time of approximately 30 to 60 minutes at room temperature․
The goal isn’t to fully thaw the pizza – a slightly frozen state is preferable․ This prevents the dough from becoming overly sticky and difficult to handle․ Partial thawing allows the heat to penetrate more evenly, ensuring a thoroughly cooked center and a delightfully crispy crust․
Remember, a little patience during the thawing process translates to a significantly enhanced pizza experience!
Using Pesto for Flavor
Elevate your Motor City Pizza experience by incorporating pesto! While not traditional, adding a layer of Kirkland pesto (Costco’s brand) before cooking introduces a vibrant, herbaceous dimension to the flavor profile․ Spread a thin, even layer directly onto the dough before adding the cheese and sauce․
The pesto’s basil and garlic notes complement the rich cheese and tangy sauce beautifully, creating a more complex and satisfying taste․ It’s a fantastic way to customize your pizza and experiment with different flavor combinations․ Don’t overdo it – a little pesto goes a long way!
Consider it a secret ingredient for a truly memorable deep-dish pizza!
Troubleshooting & Tips
Motor City Pizza can sometimes be soggy․ Ensure even cooking and a crispy crust by adjusting bake times and temperatures, and consider thawing beforehand!
Preventing a Soggy Crust
Achieving a delightfully crispy crust with Motor City Pizza requires attention to detail․ A common issue is a soggy bottom, often stemming from excess moisture․ Thawing the pizza partially before cooking is a crucial first step, reducing ice crystals that contribute to sogginess․
Ensure your oven or air fryer is adequately preheated; a hot surface immediately begins to crisp the crust․ Avoid overcrowding the cooking surface, allowing for proper air circulation․ Consider placing the pizza directly on the oven rack (with a baking sheet underneath to catch drips) for maximum heat exposure․
For air frying, a slightly lower temperature and extended cooking time can help evaporate moisture without burning the toppings․ Finally, avoid adding too many wet toppings before cooking, as they can also contribute to a soggy result․
Ensuring Even Cooking
Motor City Pizza, with its thick crust and generous toppings, can sometimes present challenges in achieving even cooking․ Rotating the pizza halfway through the cooking process is paramount, especially when using an oven․ This ensures all sections receive equal heat exposure, preventing unevenly browned or undercooked areas․
Air fryers generally offer more consistent heat distribution, but it’s still wise to check for hot spots․ If your air fryer has a rotating basket, utilize it! For microwave cooking, which is less ideal for evenness, rotating the pizza manually during cooking is essential․
Pay close attention to the cheese – it should be fully melted and bubbly across the entire surface․ A visual inspection is key to confirming even cooking before removing the pizza․
Reheating Leftover Motor City Pizza
Reheating Motor City Pizza requires a delicate touch to restore its crispy crust and melty cheese without sacrificing quality․ The oven is the preferred method; preheat to 350°F (175°C) and bake for 5-10 minutes, or until heated through․ Placing the slice on a baking sheet helps maintain crispness․
An air fryer also works well – reheat at 325°F (160°C) for 3-5 minutes․ Avoid the microwave if possible, as it tends to make the crust soggy․ If microwaving is necessary, use short bursts (20-30 seconds) and place a paper towel underneath to absorb moisture․
A quick spritz of water before oven or air fryer reheating can help revive the crust’s texture․ Enjoy!